Klaviyo - Push Notification Guide
Last updated: June 3, 2026
Push notifications are your app's most powerful retention tool. Unlike emails, they land directly on the user’s lock screen and boast 3-5x higher engagement rates.
Phase 1: Capturing Consent
You cannot send a push unless the user explicitly grants permission.
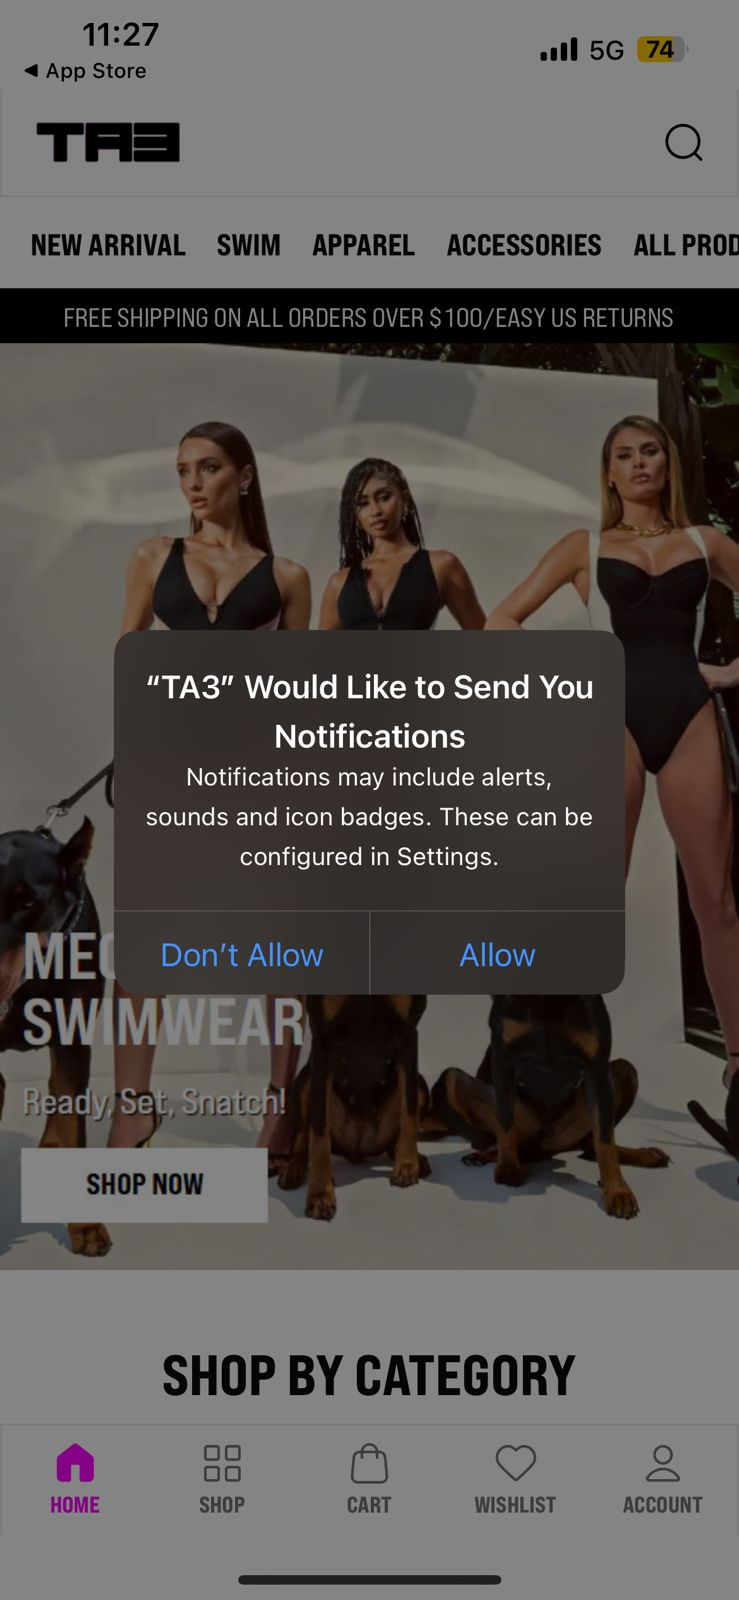
iOS: The app will trigger a native system prompt (usually on the first or second launch). We recommend using a "Soft Prompt" first—a custom in-app screen explaining why they should enable notifications—to increase opt-in rates.
Android: Traditionally "Opt-out" by default, but Android 13+ now requires a permission prompt similar to iOS.
Token Sync: Once a user clicks "Allow," Appbrew’s SDK automatically sends a unique Push Token to that user’s Klaviyo profile.
Phase 2: Setting up push campaign
Here is a walkthrough video to set them up in Klaviyo:
Step by step guide:
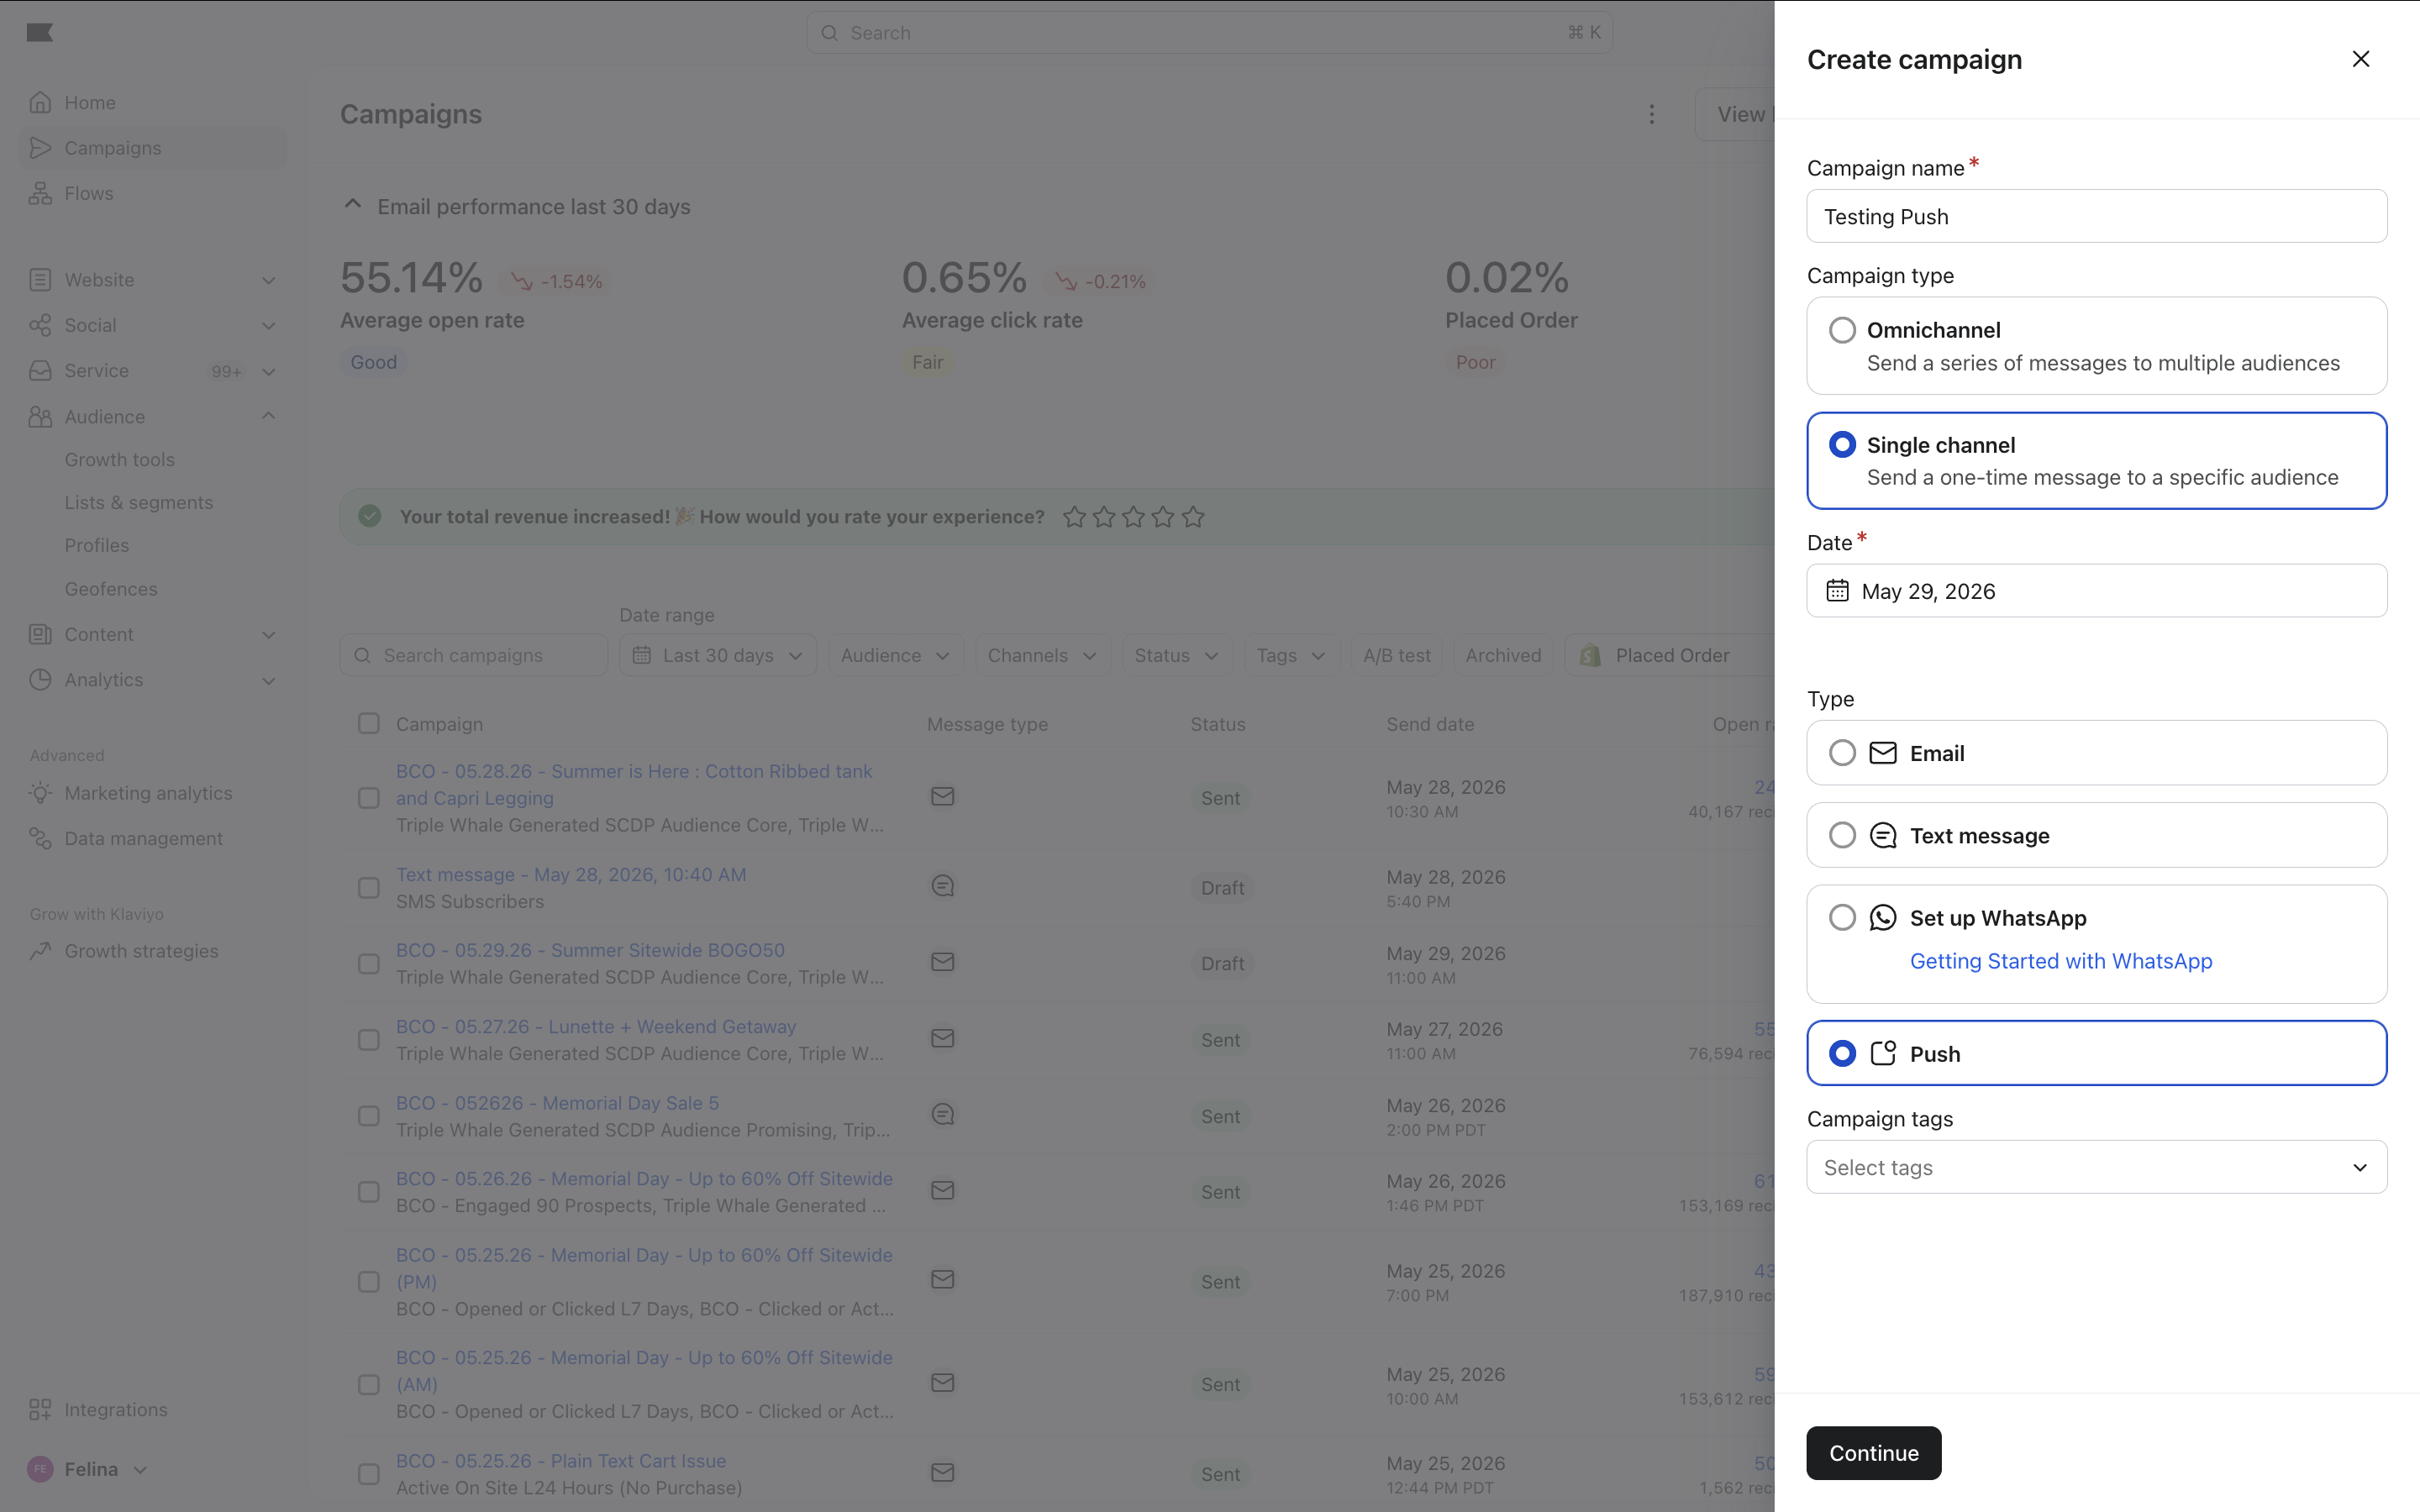
Campaign Setup: In your Klaviyo dashboard, go to Campaigns and select Create Campaign > Push Notification.
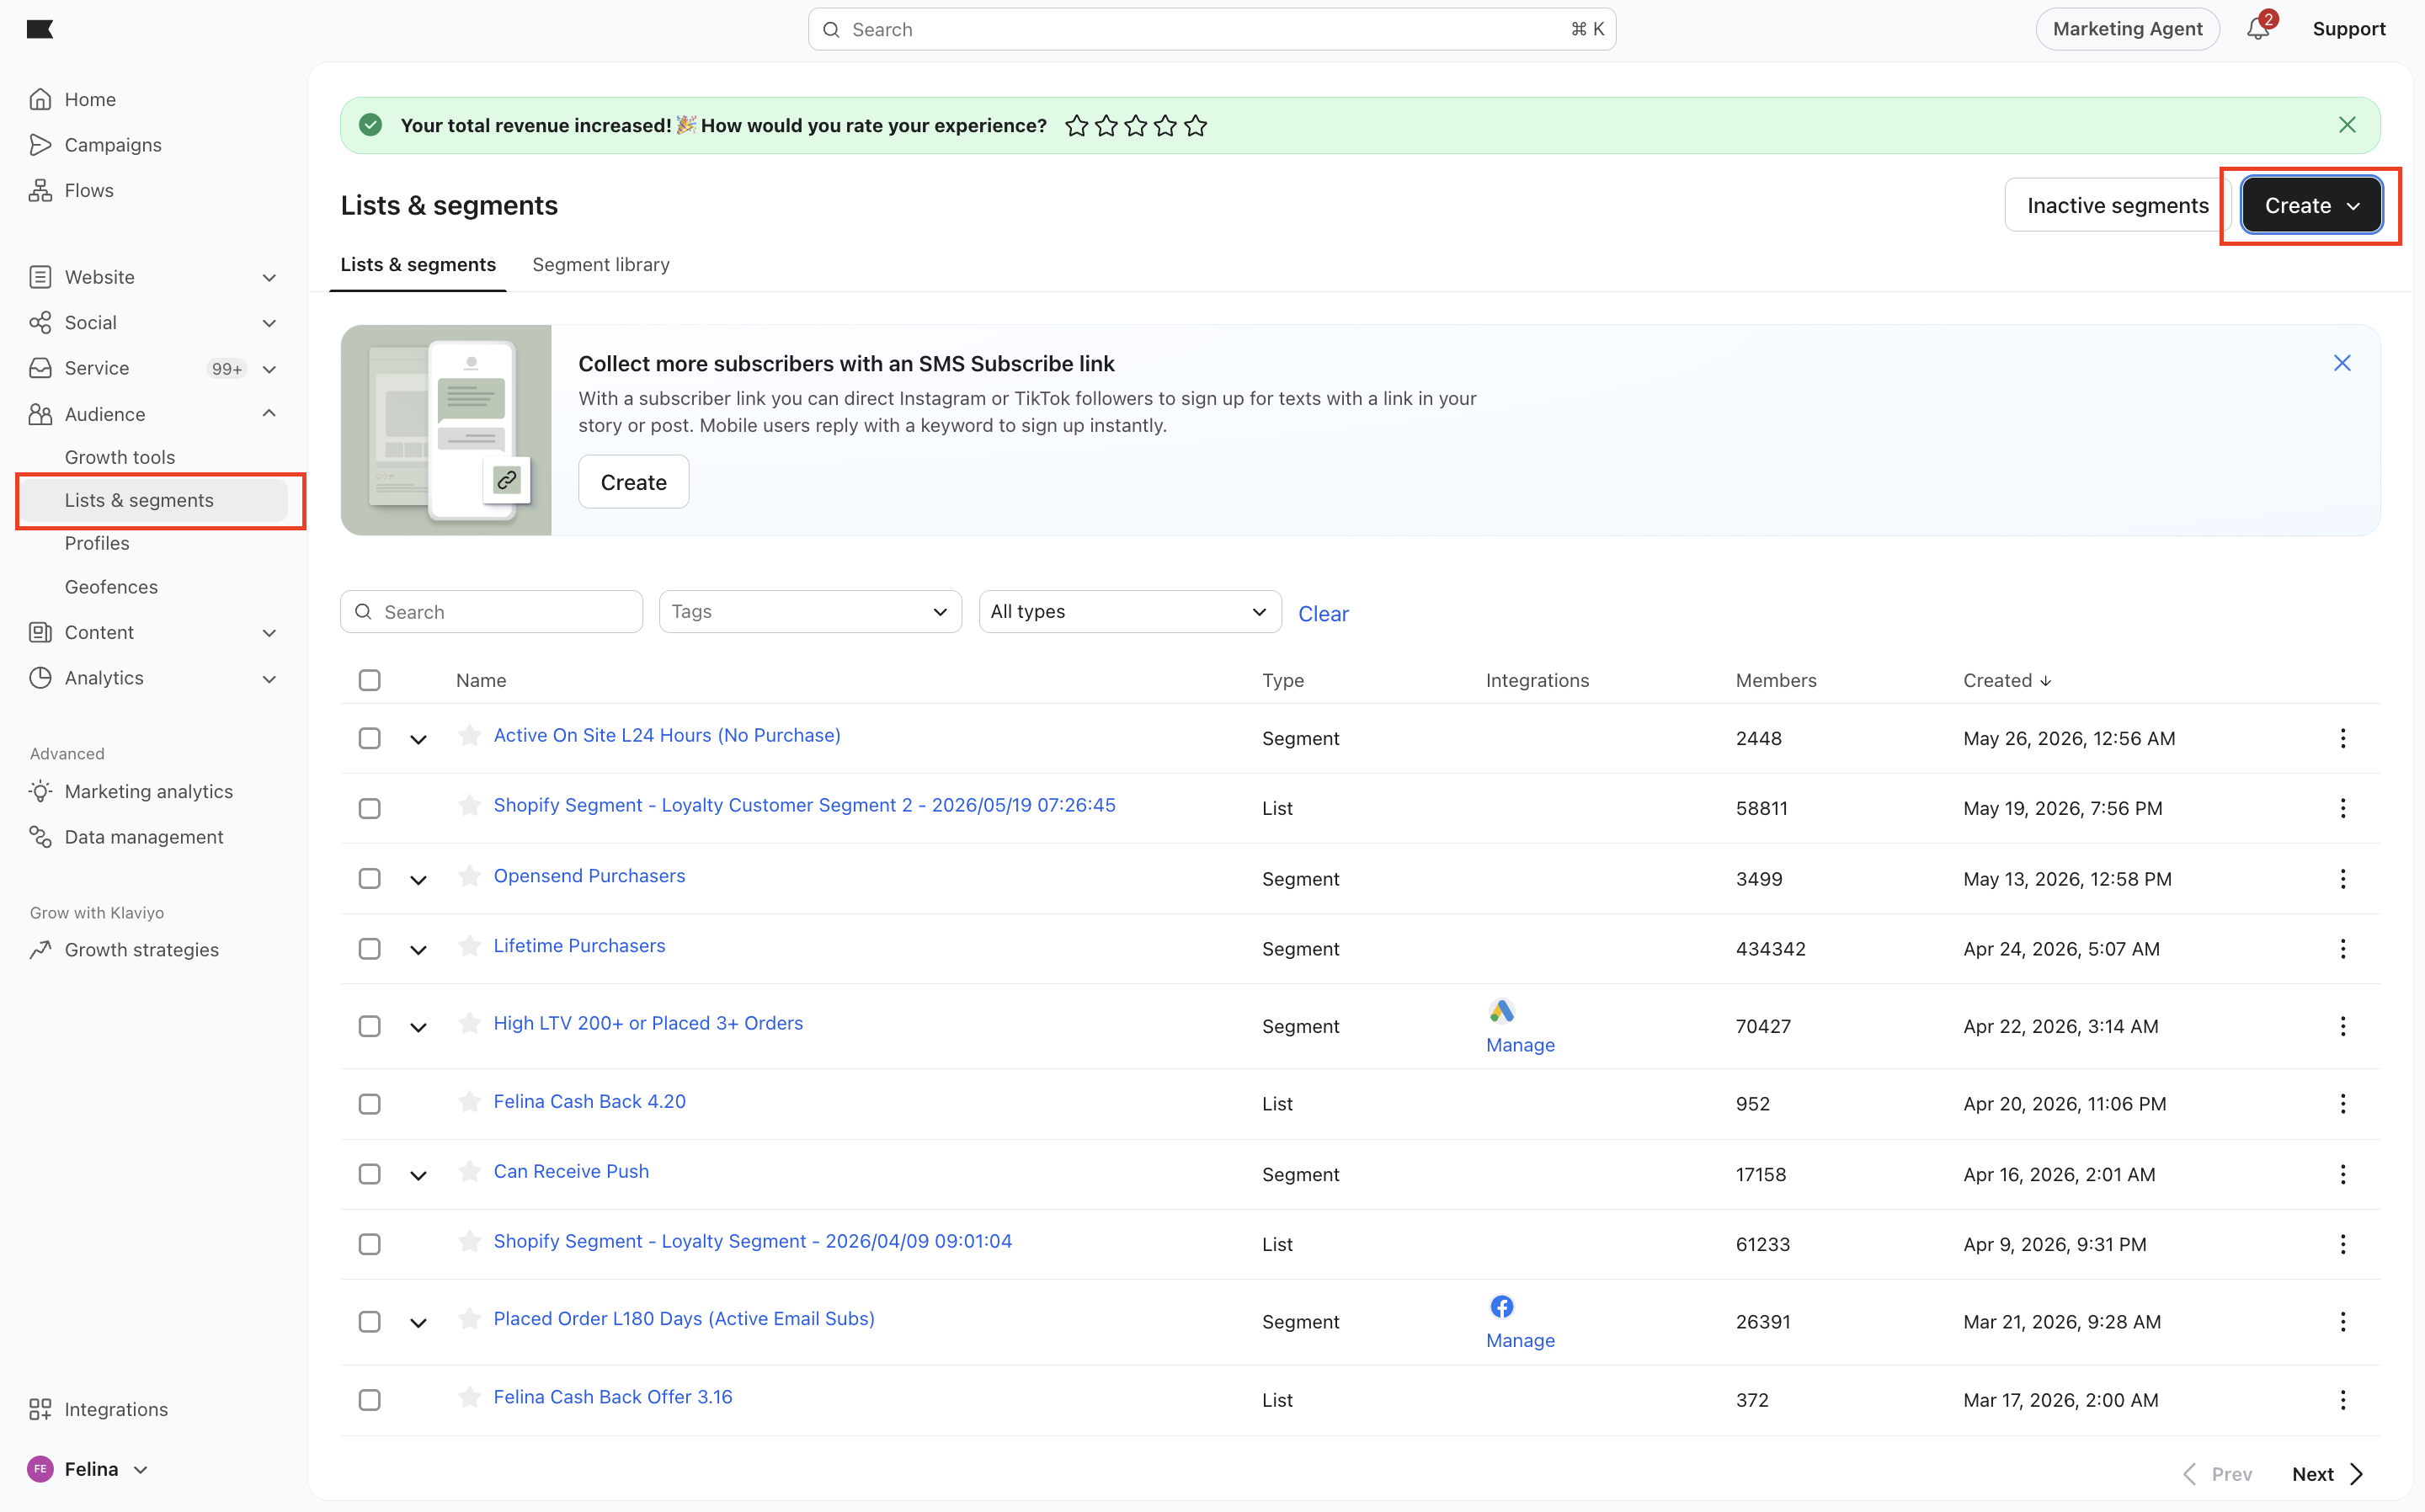
Audience Selection: Go to Audience → Lists & Segments, create a new List, and manually add your own test profile (the one you just logged in with) to this list. Or you can select an already existing list.
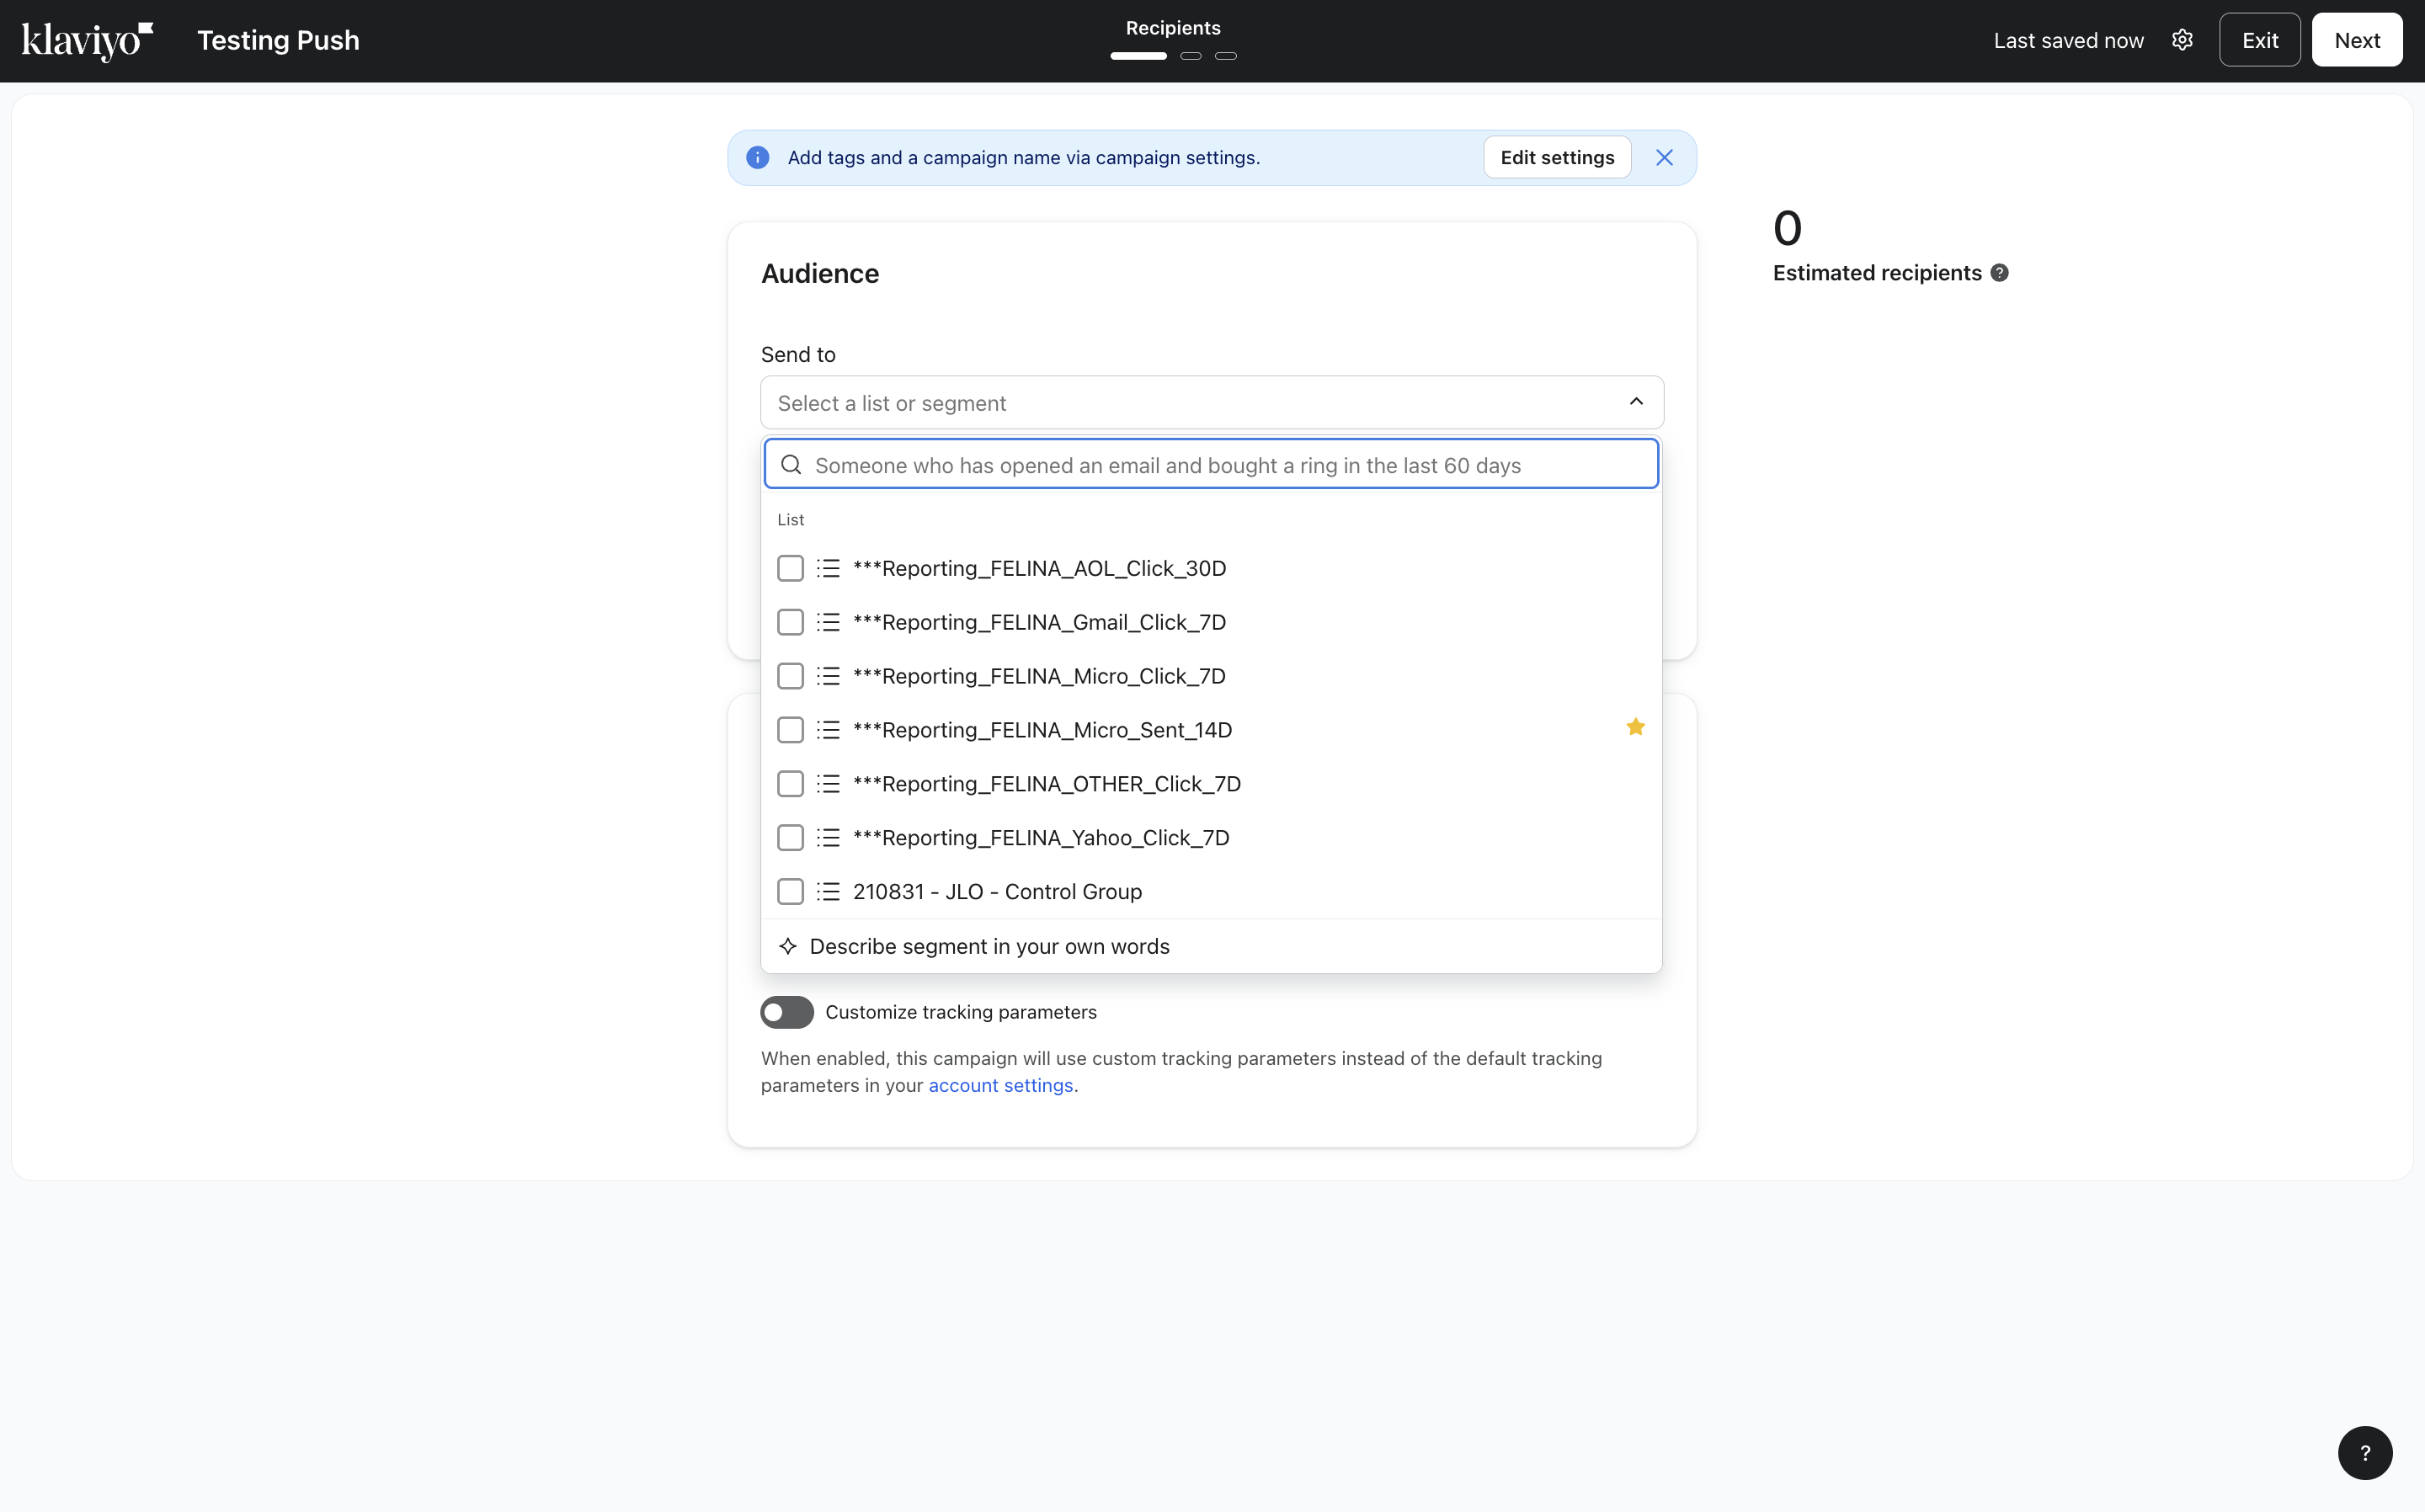
Recipients: Go back to your Campaign setup and select the List you just created in the Recipients section.
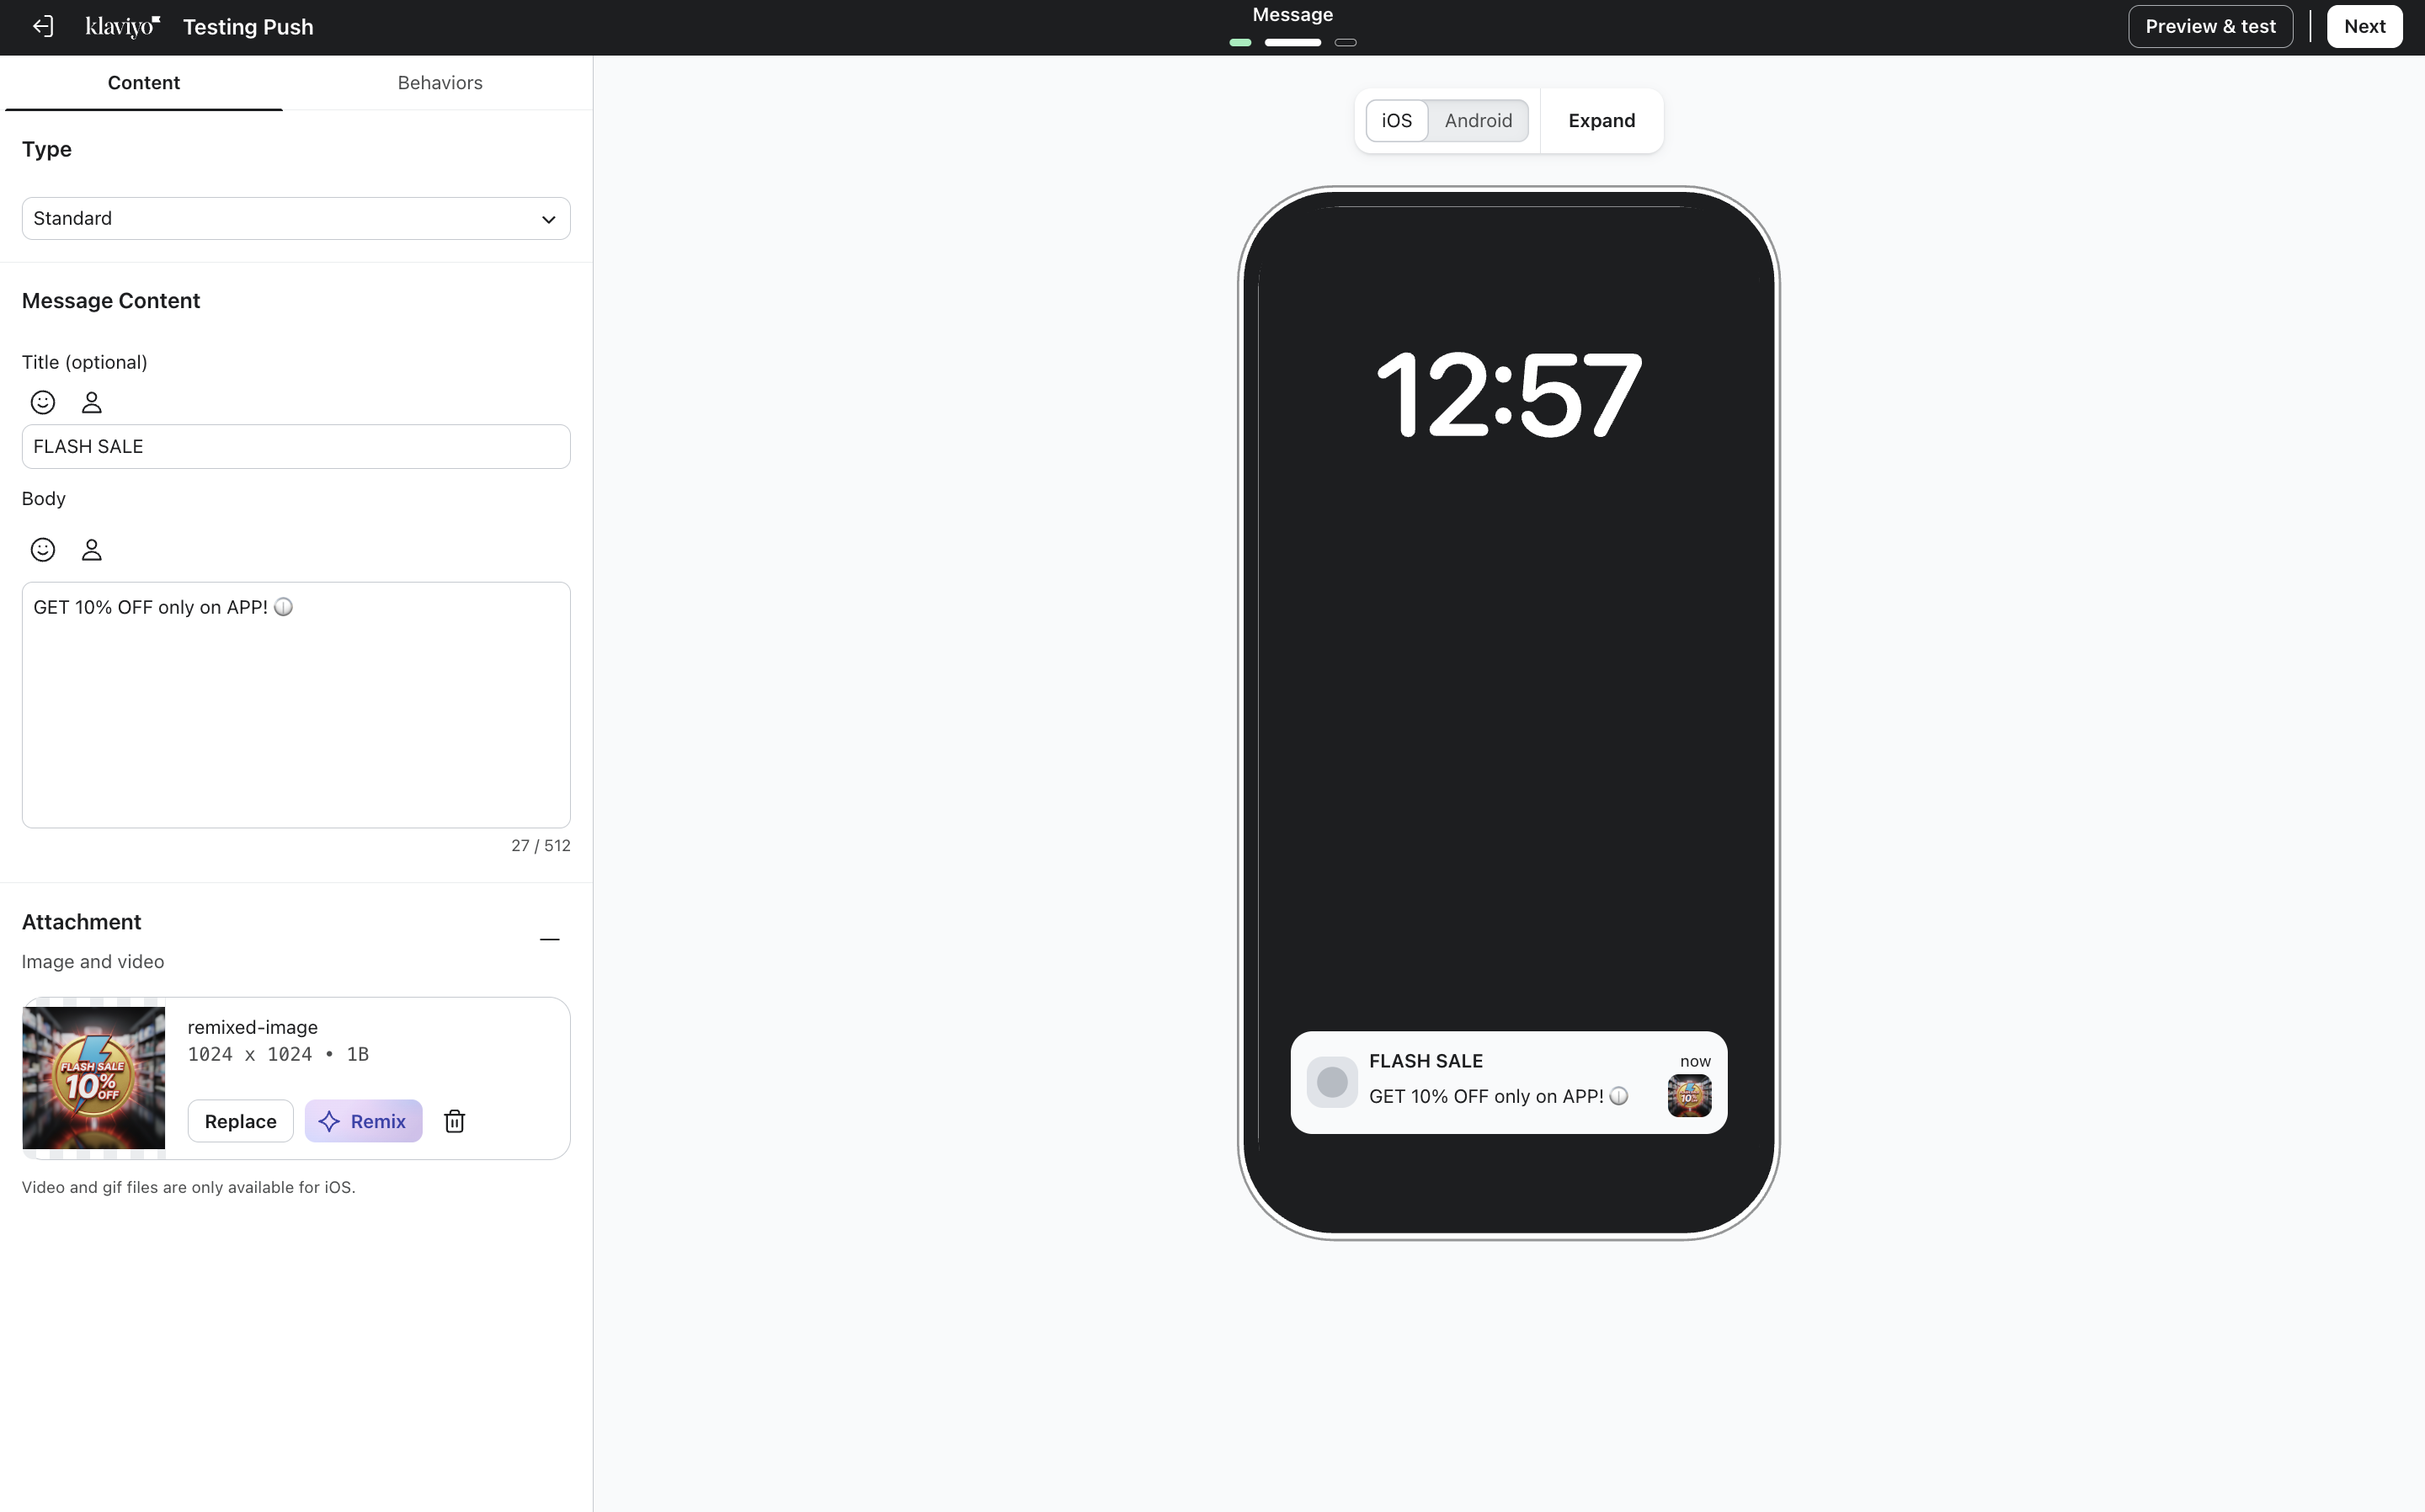
Content Design: In the Content section, provide a Title, Body, and an Image (to test rich media). Go to the behaviors tab to setup the nature of the notification.
In case you want to simply open the notification in app and not to a specific product/collection or page, then select "Open App"
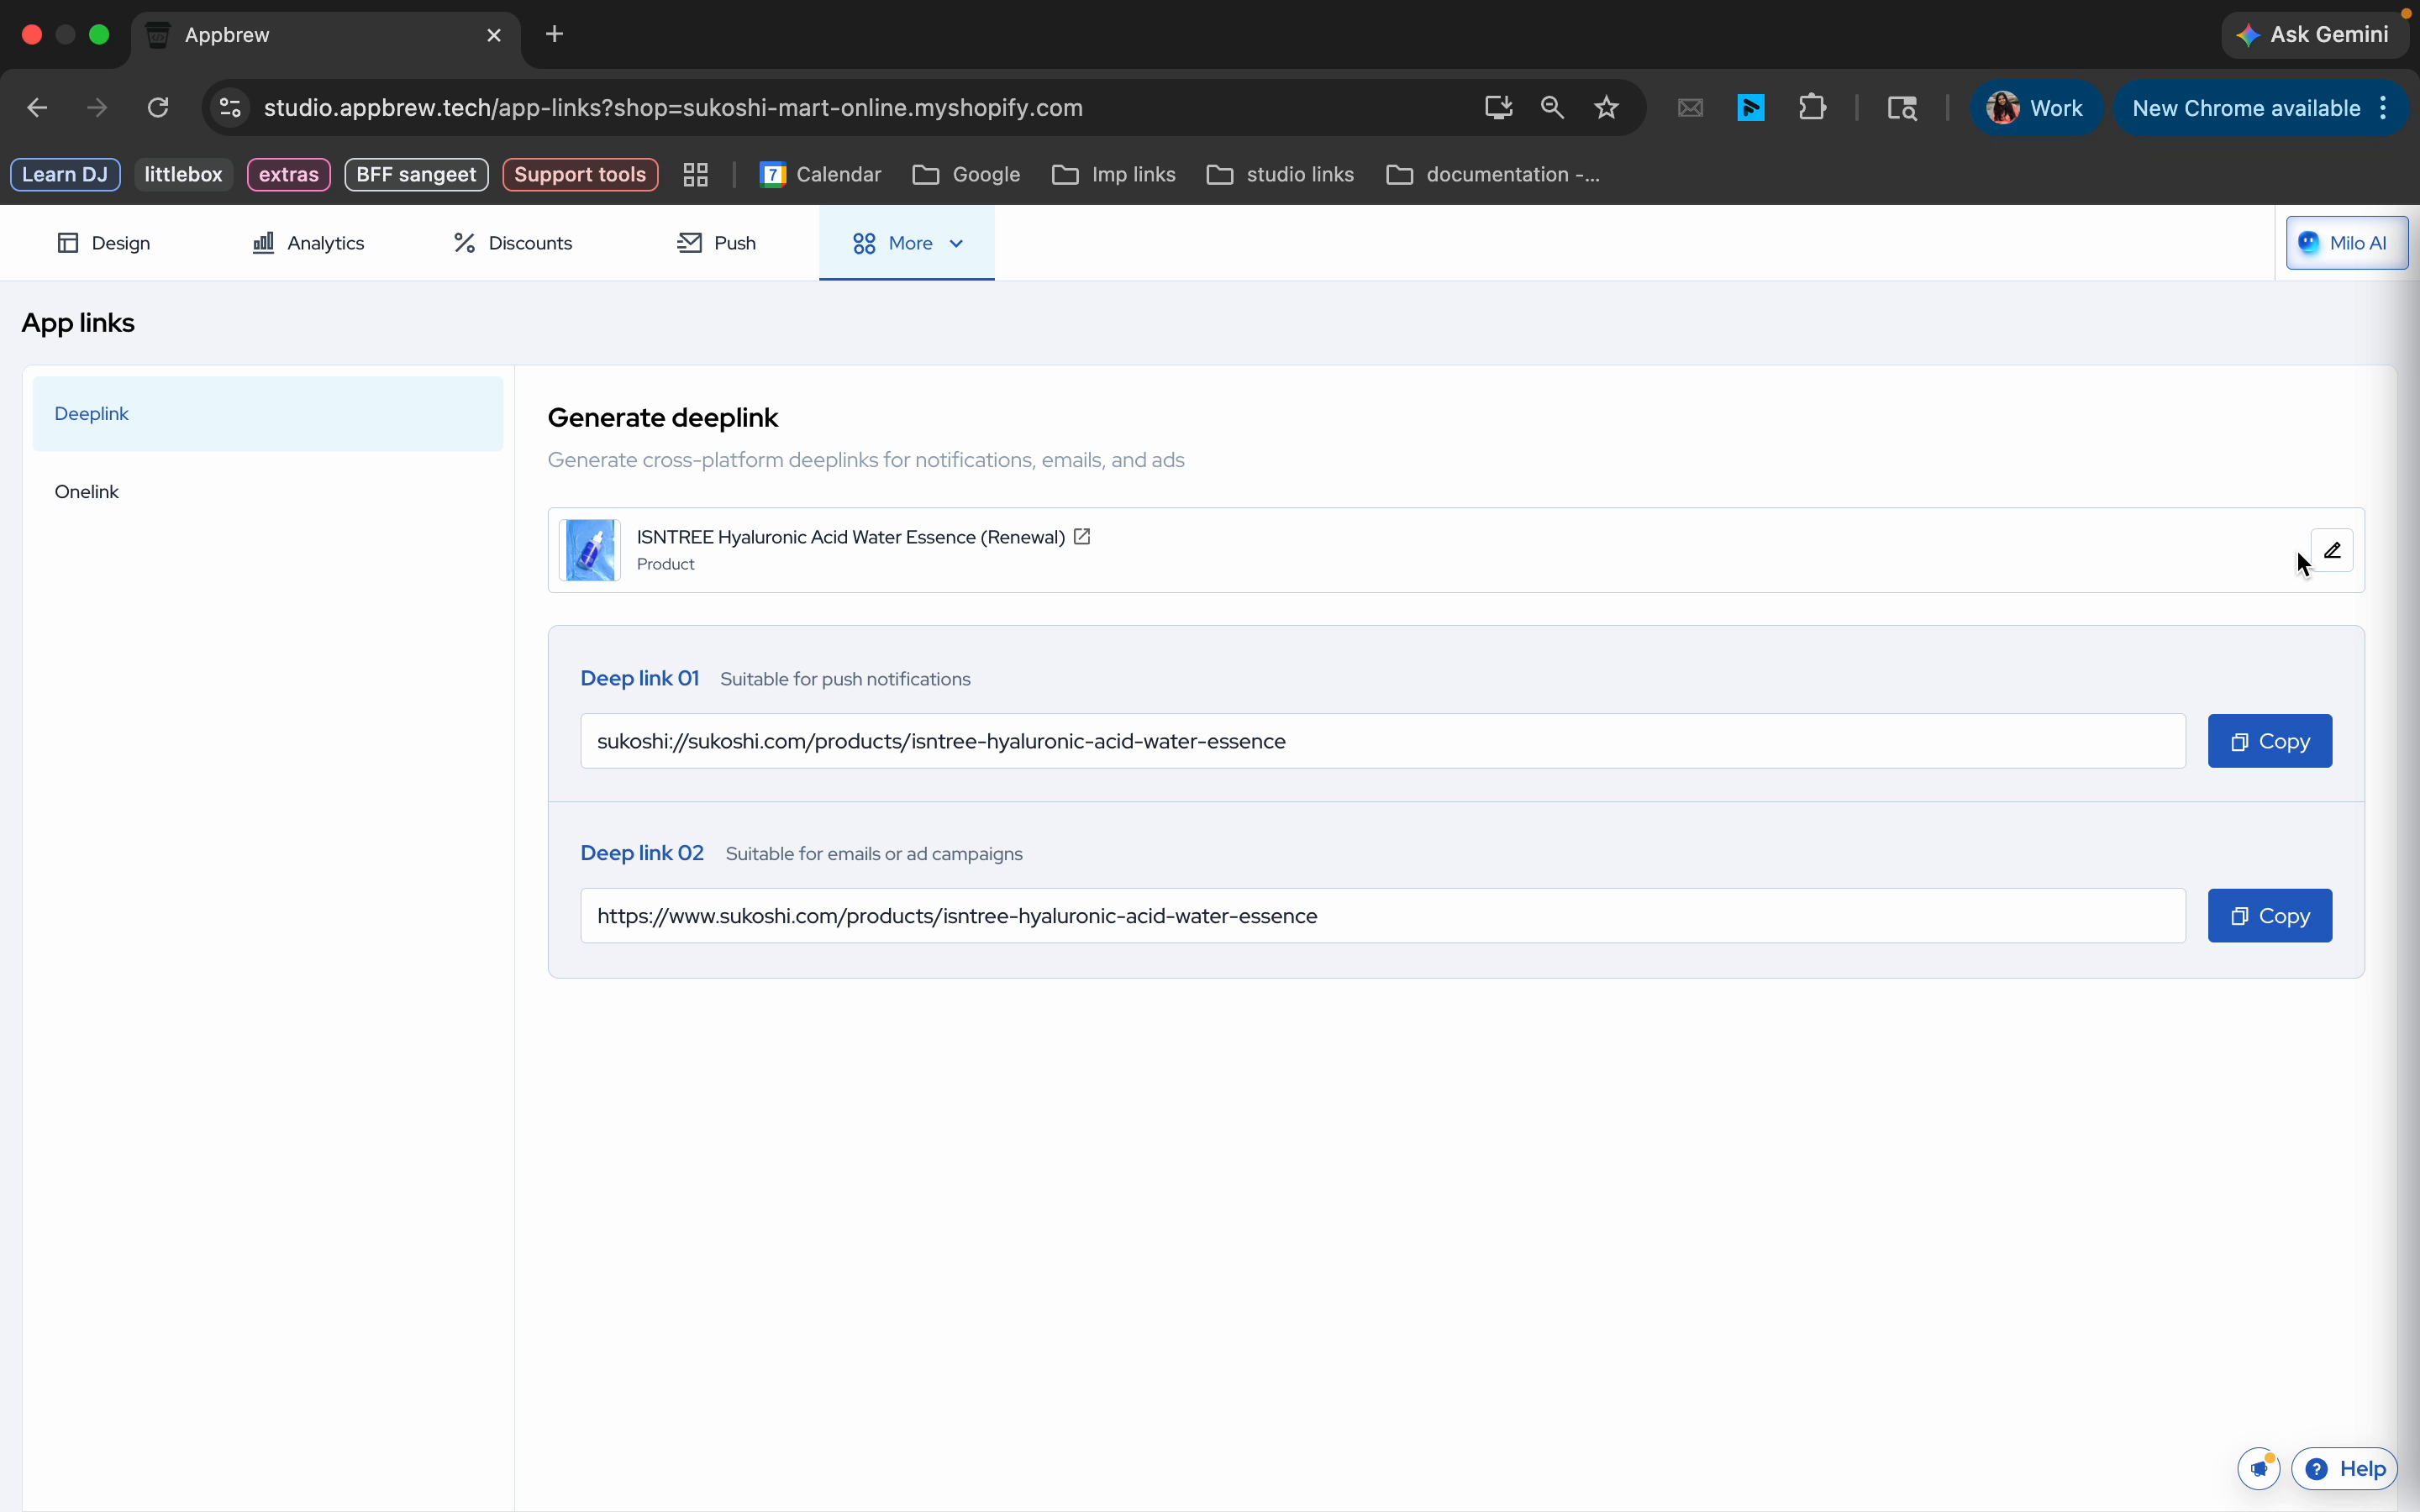
If you want to open a specific product or collection or page > select deep link. Generate the deep links from the Appbrew dashboard and then copy them. Paste the copied deep link into the Deep link fields (within the Push campaign setup) for both iOS and Android.
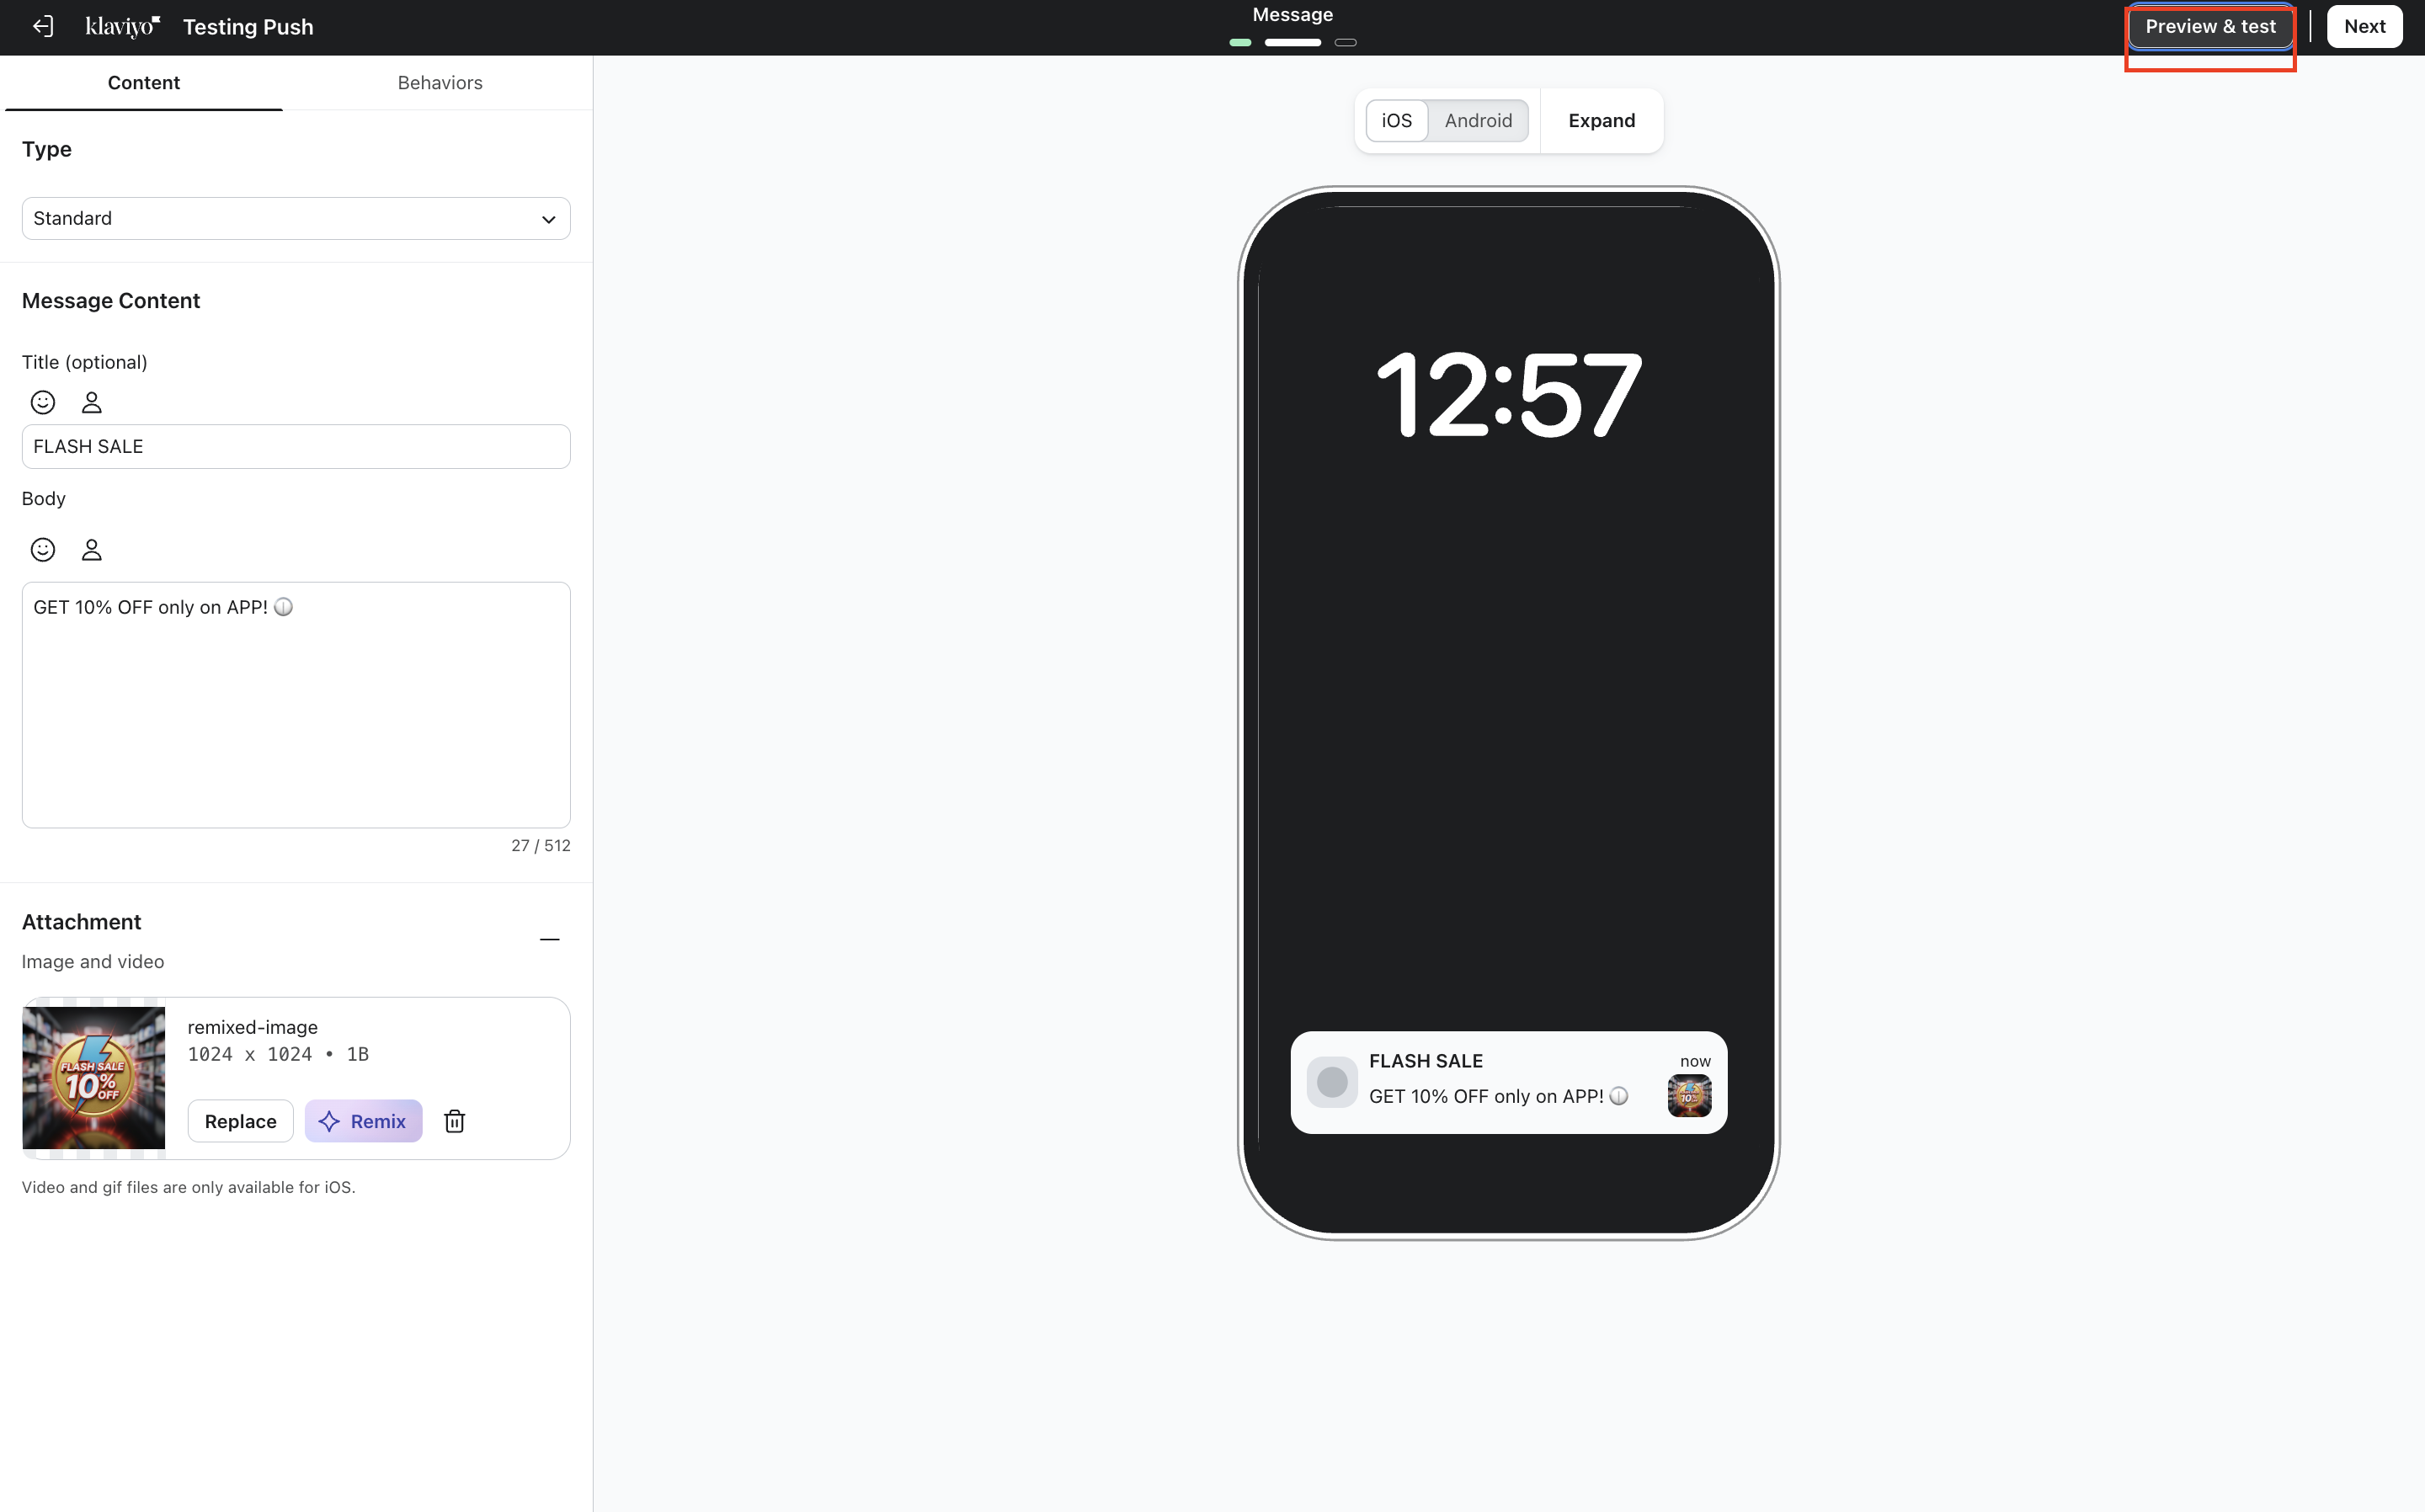
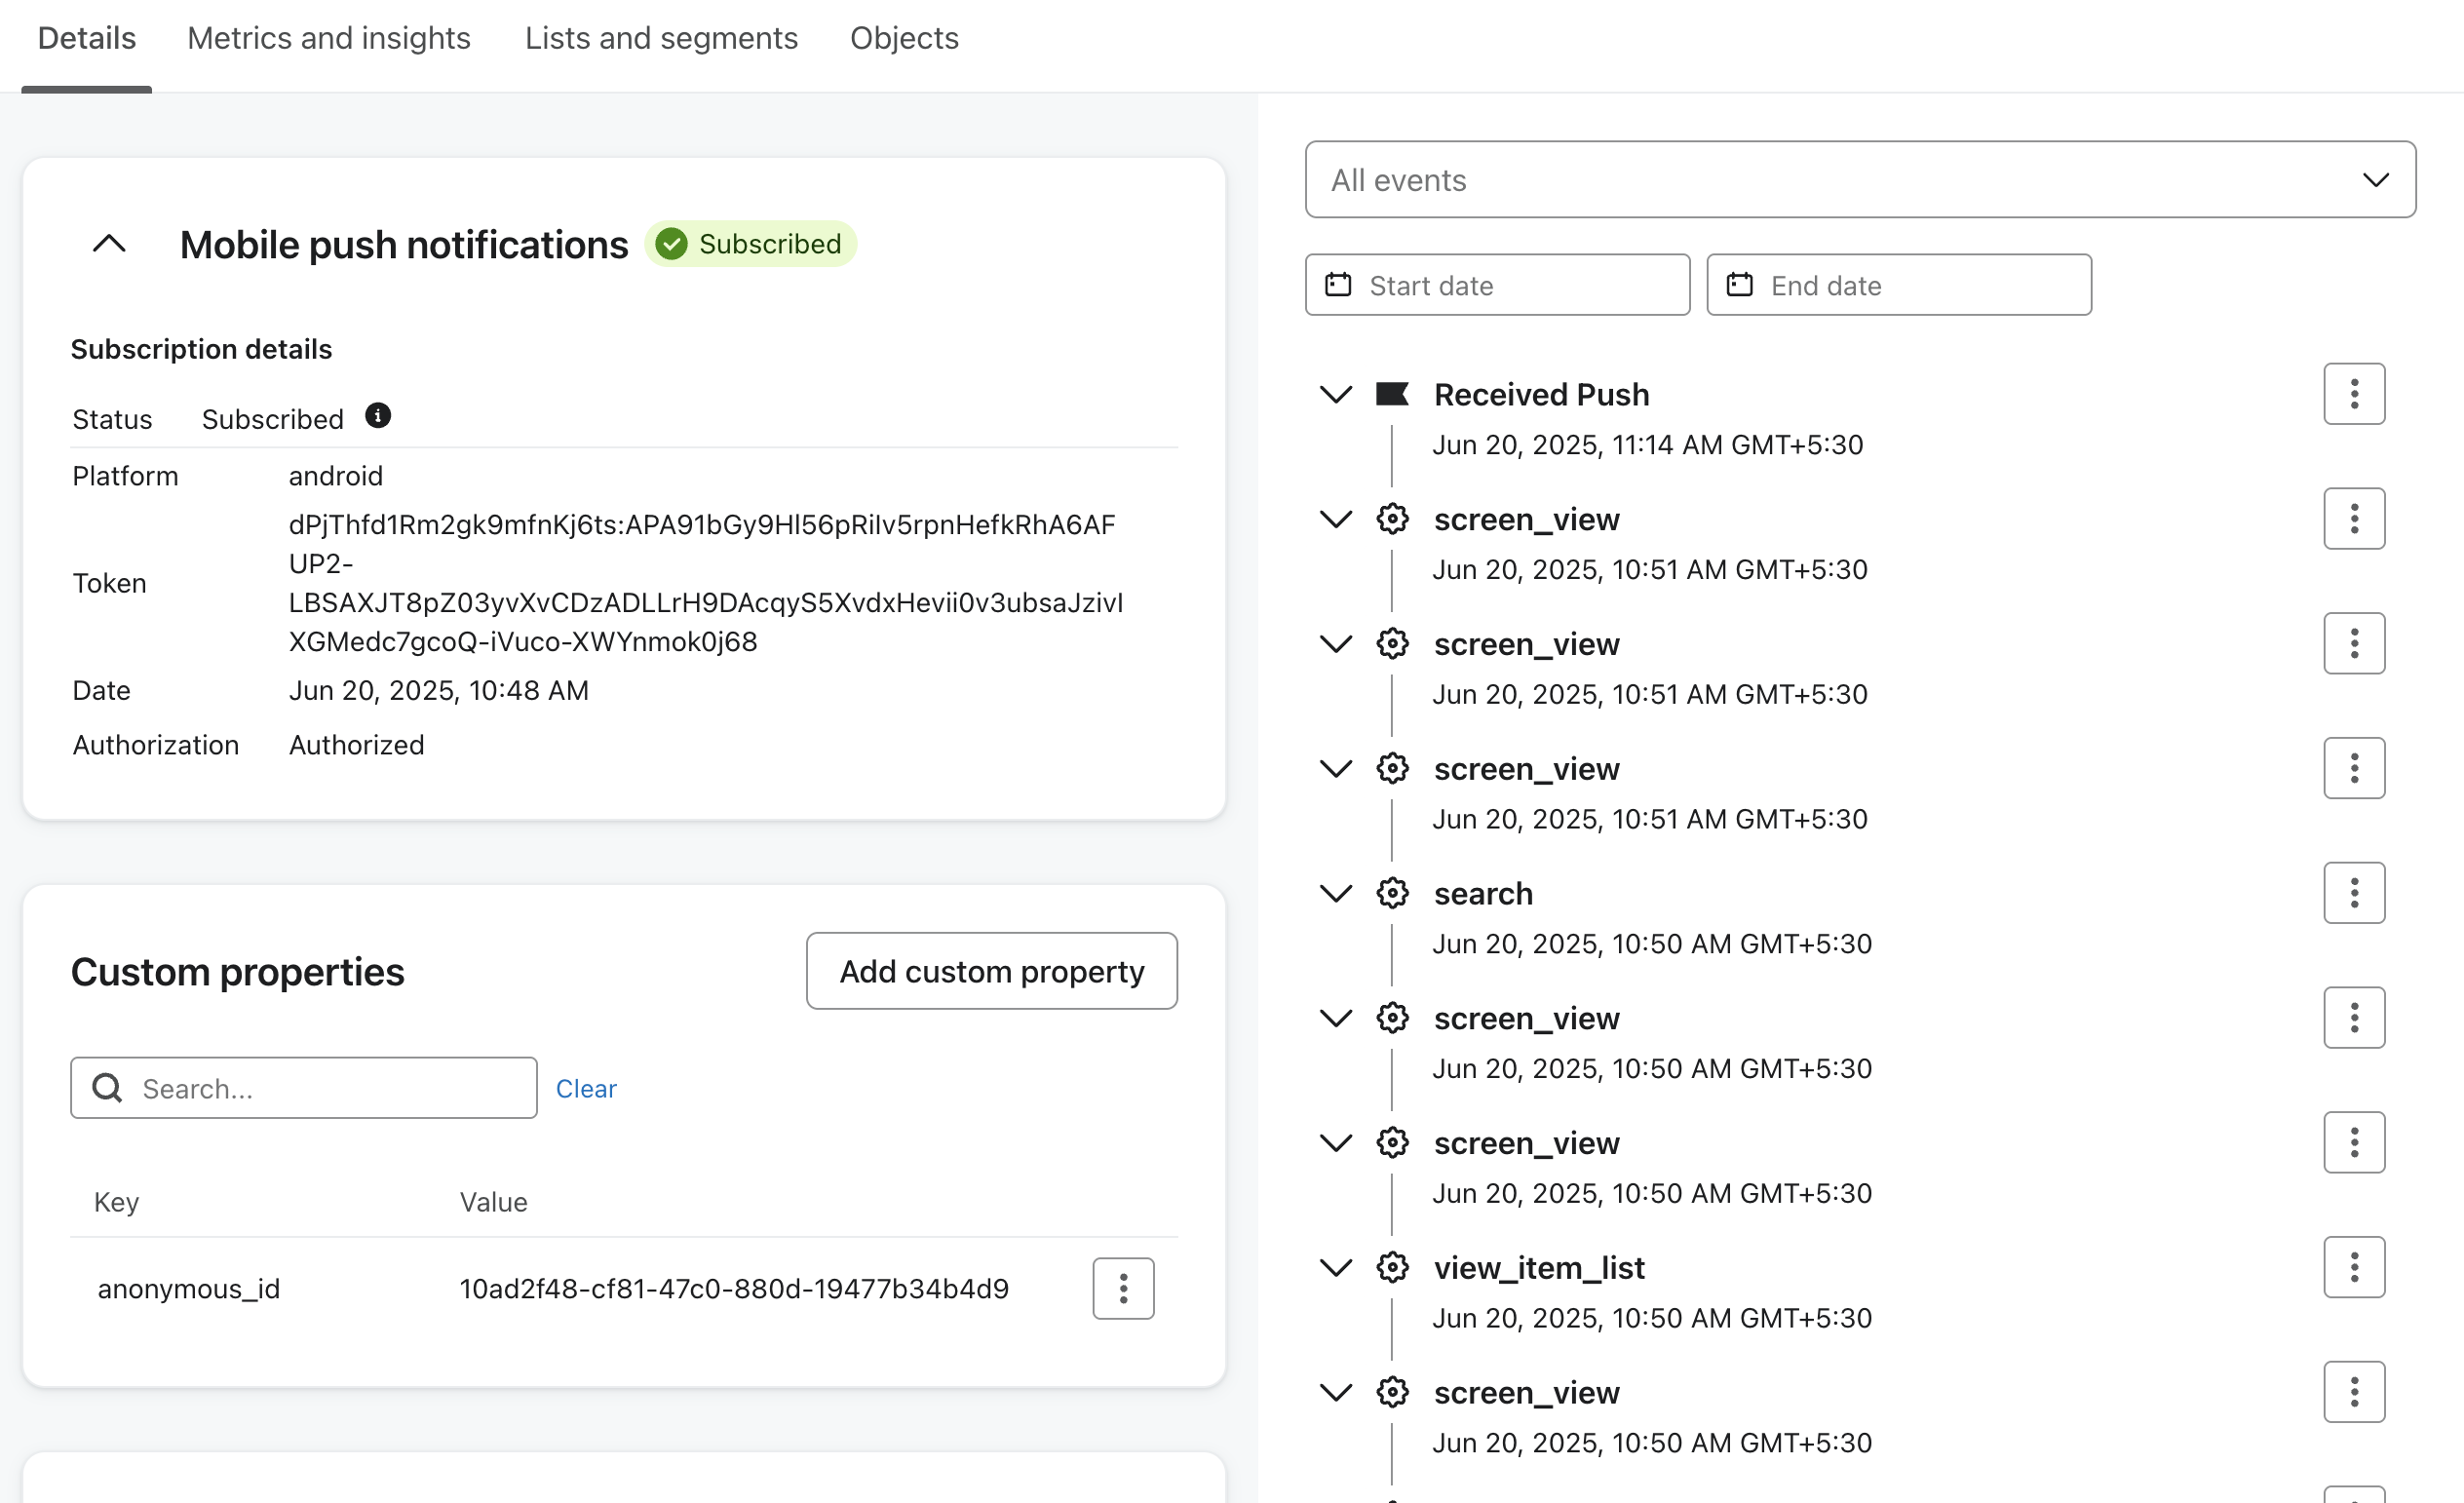
Click on “Send Preview”. You will need to add push token for the testing profile. You can get this from Klaviyo.
Navigate to Audiences > Profile.
Search for the specific user profile you want to test with.
Open their mobile notification settings and copy the push token from their profile.
Return to the preview modal and paste the push token into the test recipient field.
You should see the notification appear on your device.
State Testing: Test the notification delivery while the app is in three states: Active (app open), Background (app minimized), and Killed (app closed/swiped away).
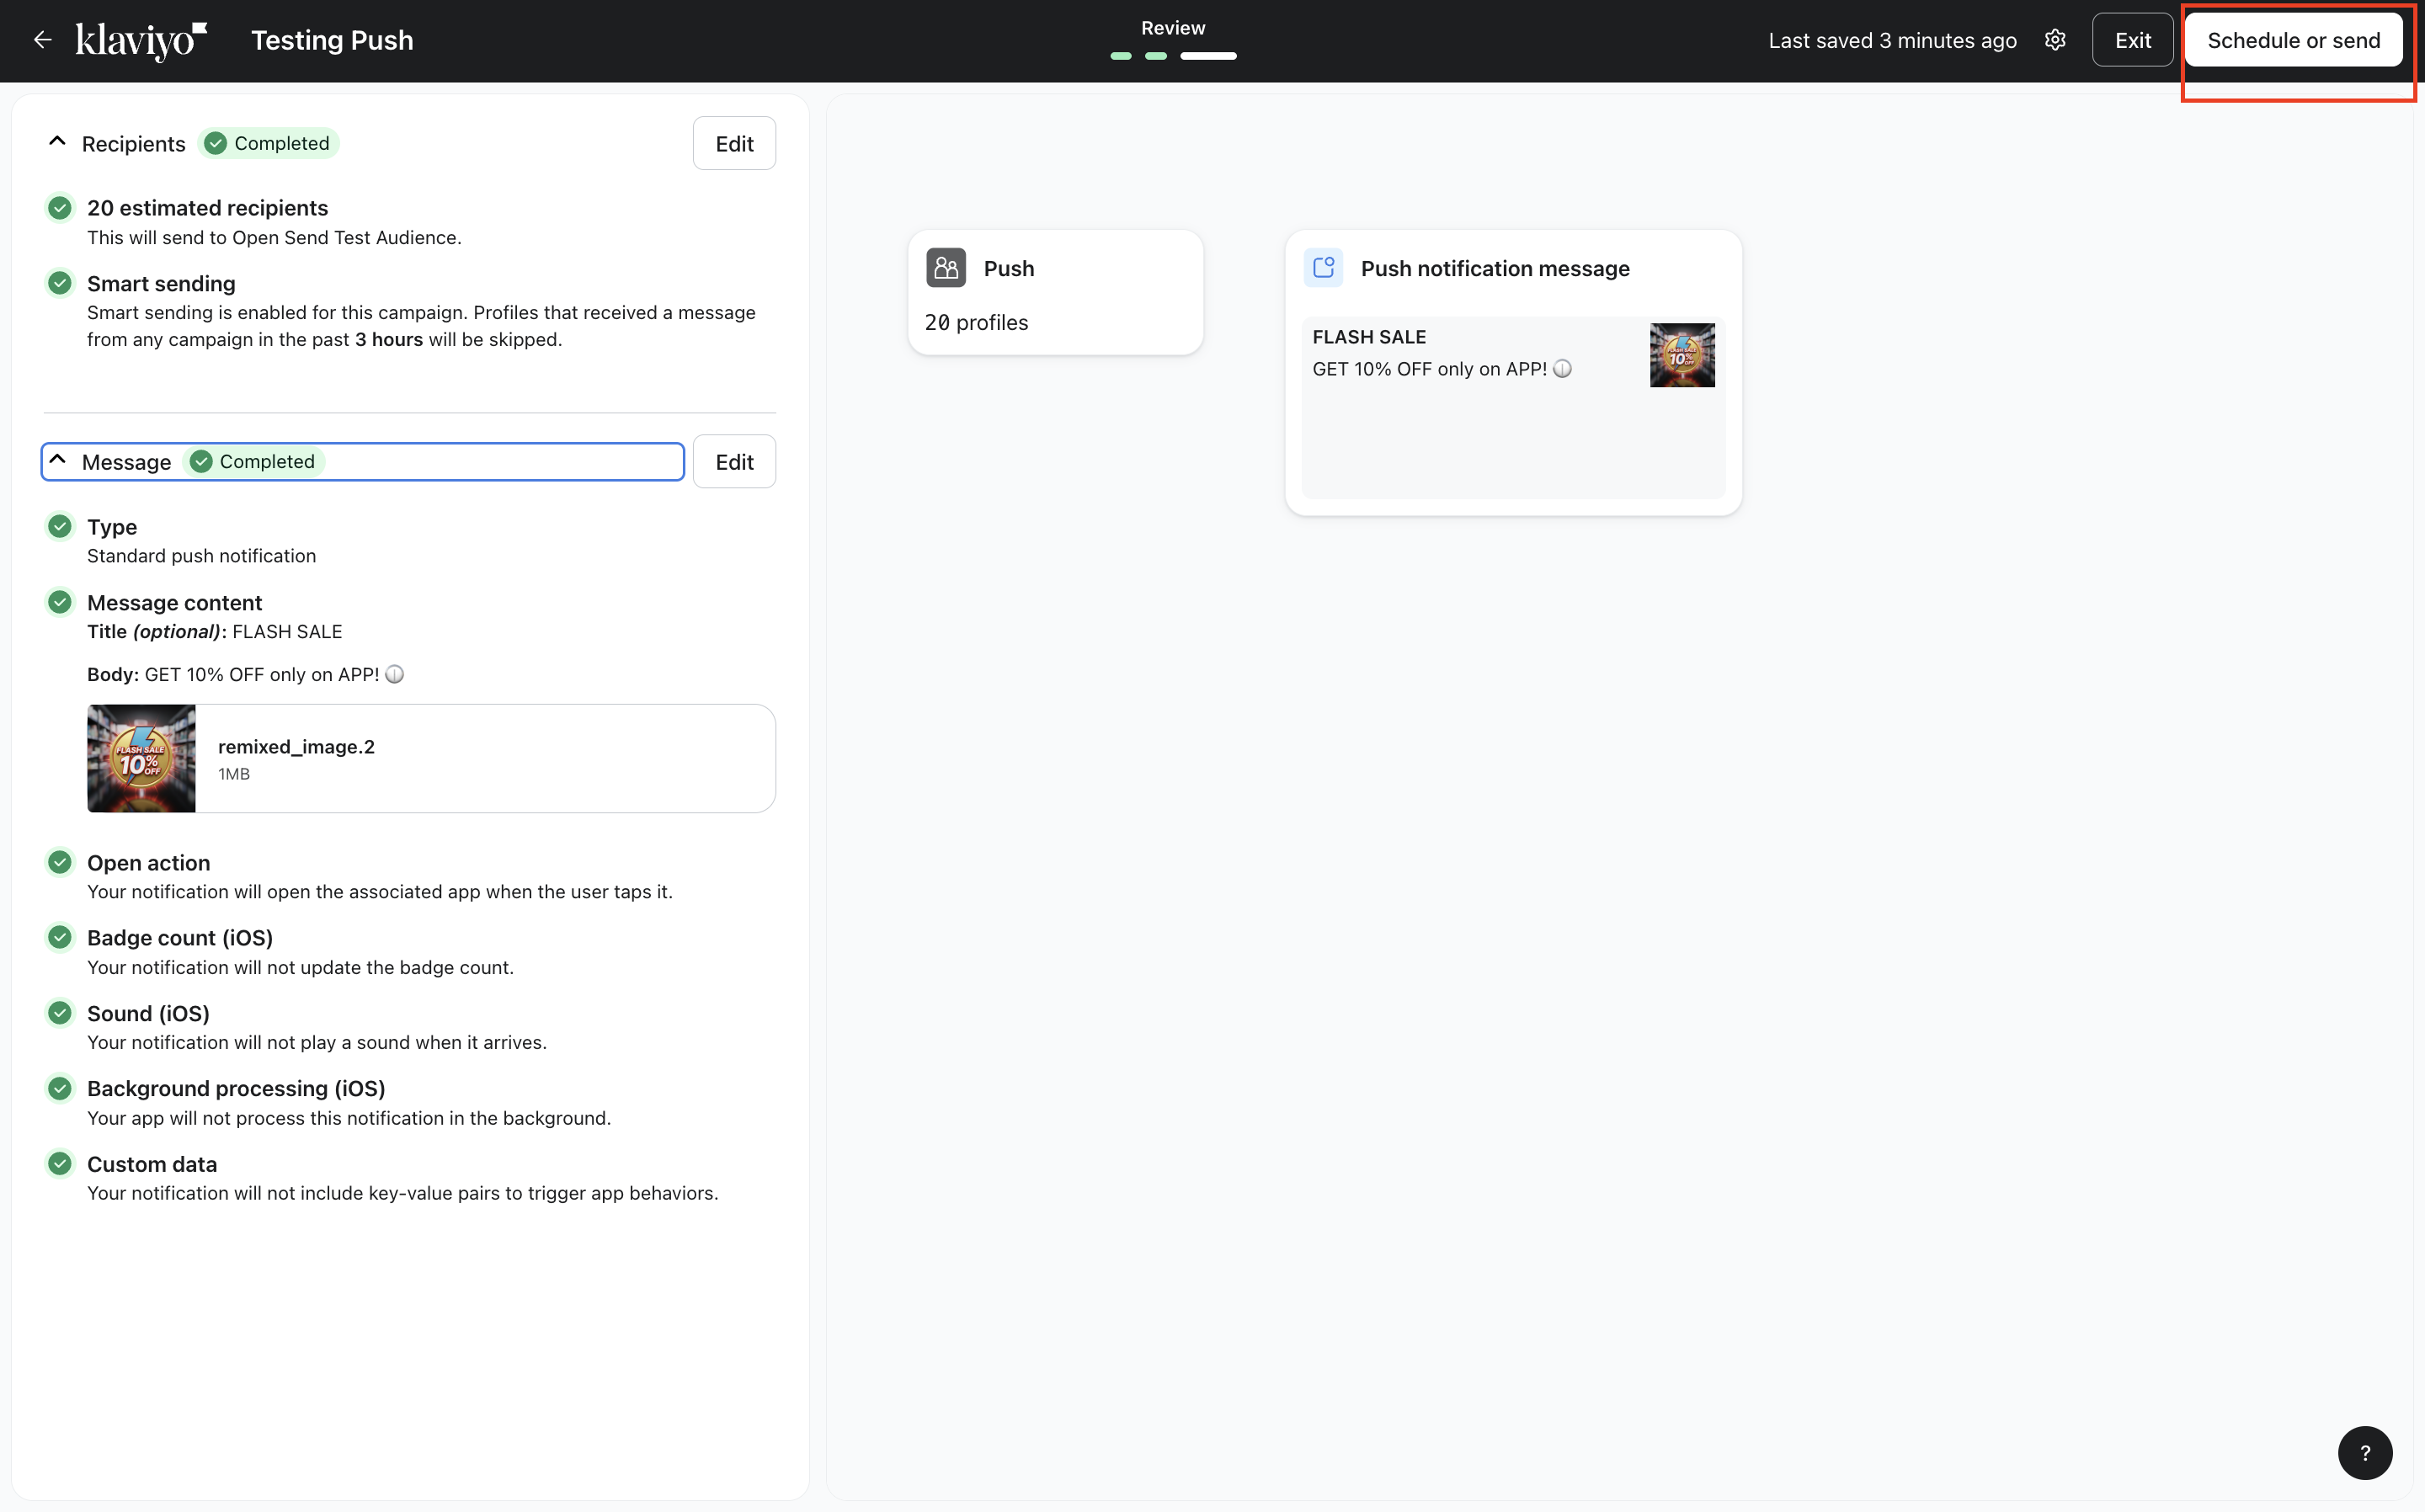
Live Send & Verification: Once the preview is successful, save your campaign and schedule it to “Send Now.”
You should receive the notification within about 5 minutes. After interacting with the notification, you will be able to see the following events in the Klaviyo Activity Feed or Analytics:
Received Push: Confirms the message was successfully delivered to the device.
Opened Push: Confirms the user clicked the notification (this verifies deep linking logic).
Placed Order: If a purchase is made shortly after opening the push, Klaviyo will attribute the revenue directly to this campaign.
Add on features -
Creating Flows for Push notification
In the context of the Klaviyo integration, "Flows" are automated sequences of messages (push notifications, emails, or SMS) that are triggered by specific customer actions. Instead of manually sending one-off campaigns, flows work in the background 24/7 to engage users at the right moment.
How Push Flows Work:
Triggered by events like product views, cart additions, or sign-ups
Targeted to specific segments (e.g., push-subscribed users, high-intent shoppers)
Customized with dynamic content (e.g., product names, prices, or user first names)
Scheduled with delays, splits, and filters to tailor the user journey
Common Use Cases
Abandoned cart reminders
Post-purchase thank you or review requests
Welcome/onboarding series
Browse Abandonment
Winback or re-engagement messages
Push flows integrate seamlessly with email and SMS in Klaviyo, allowing you to create coordinated, multi-channel experiences from a single platform.
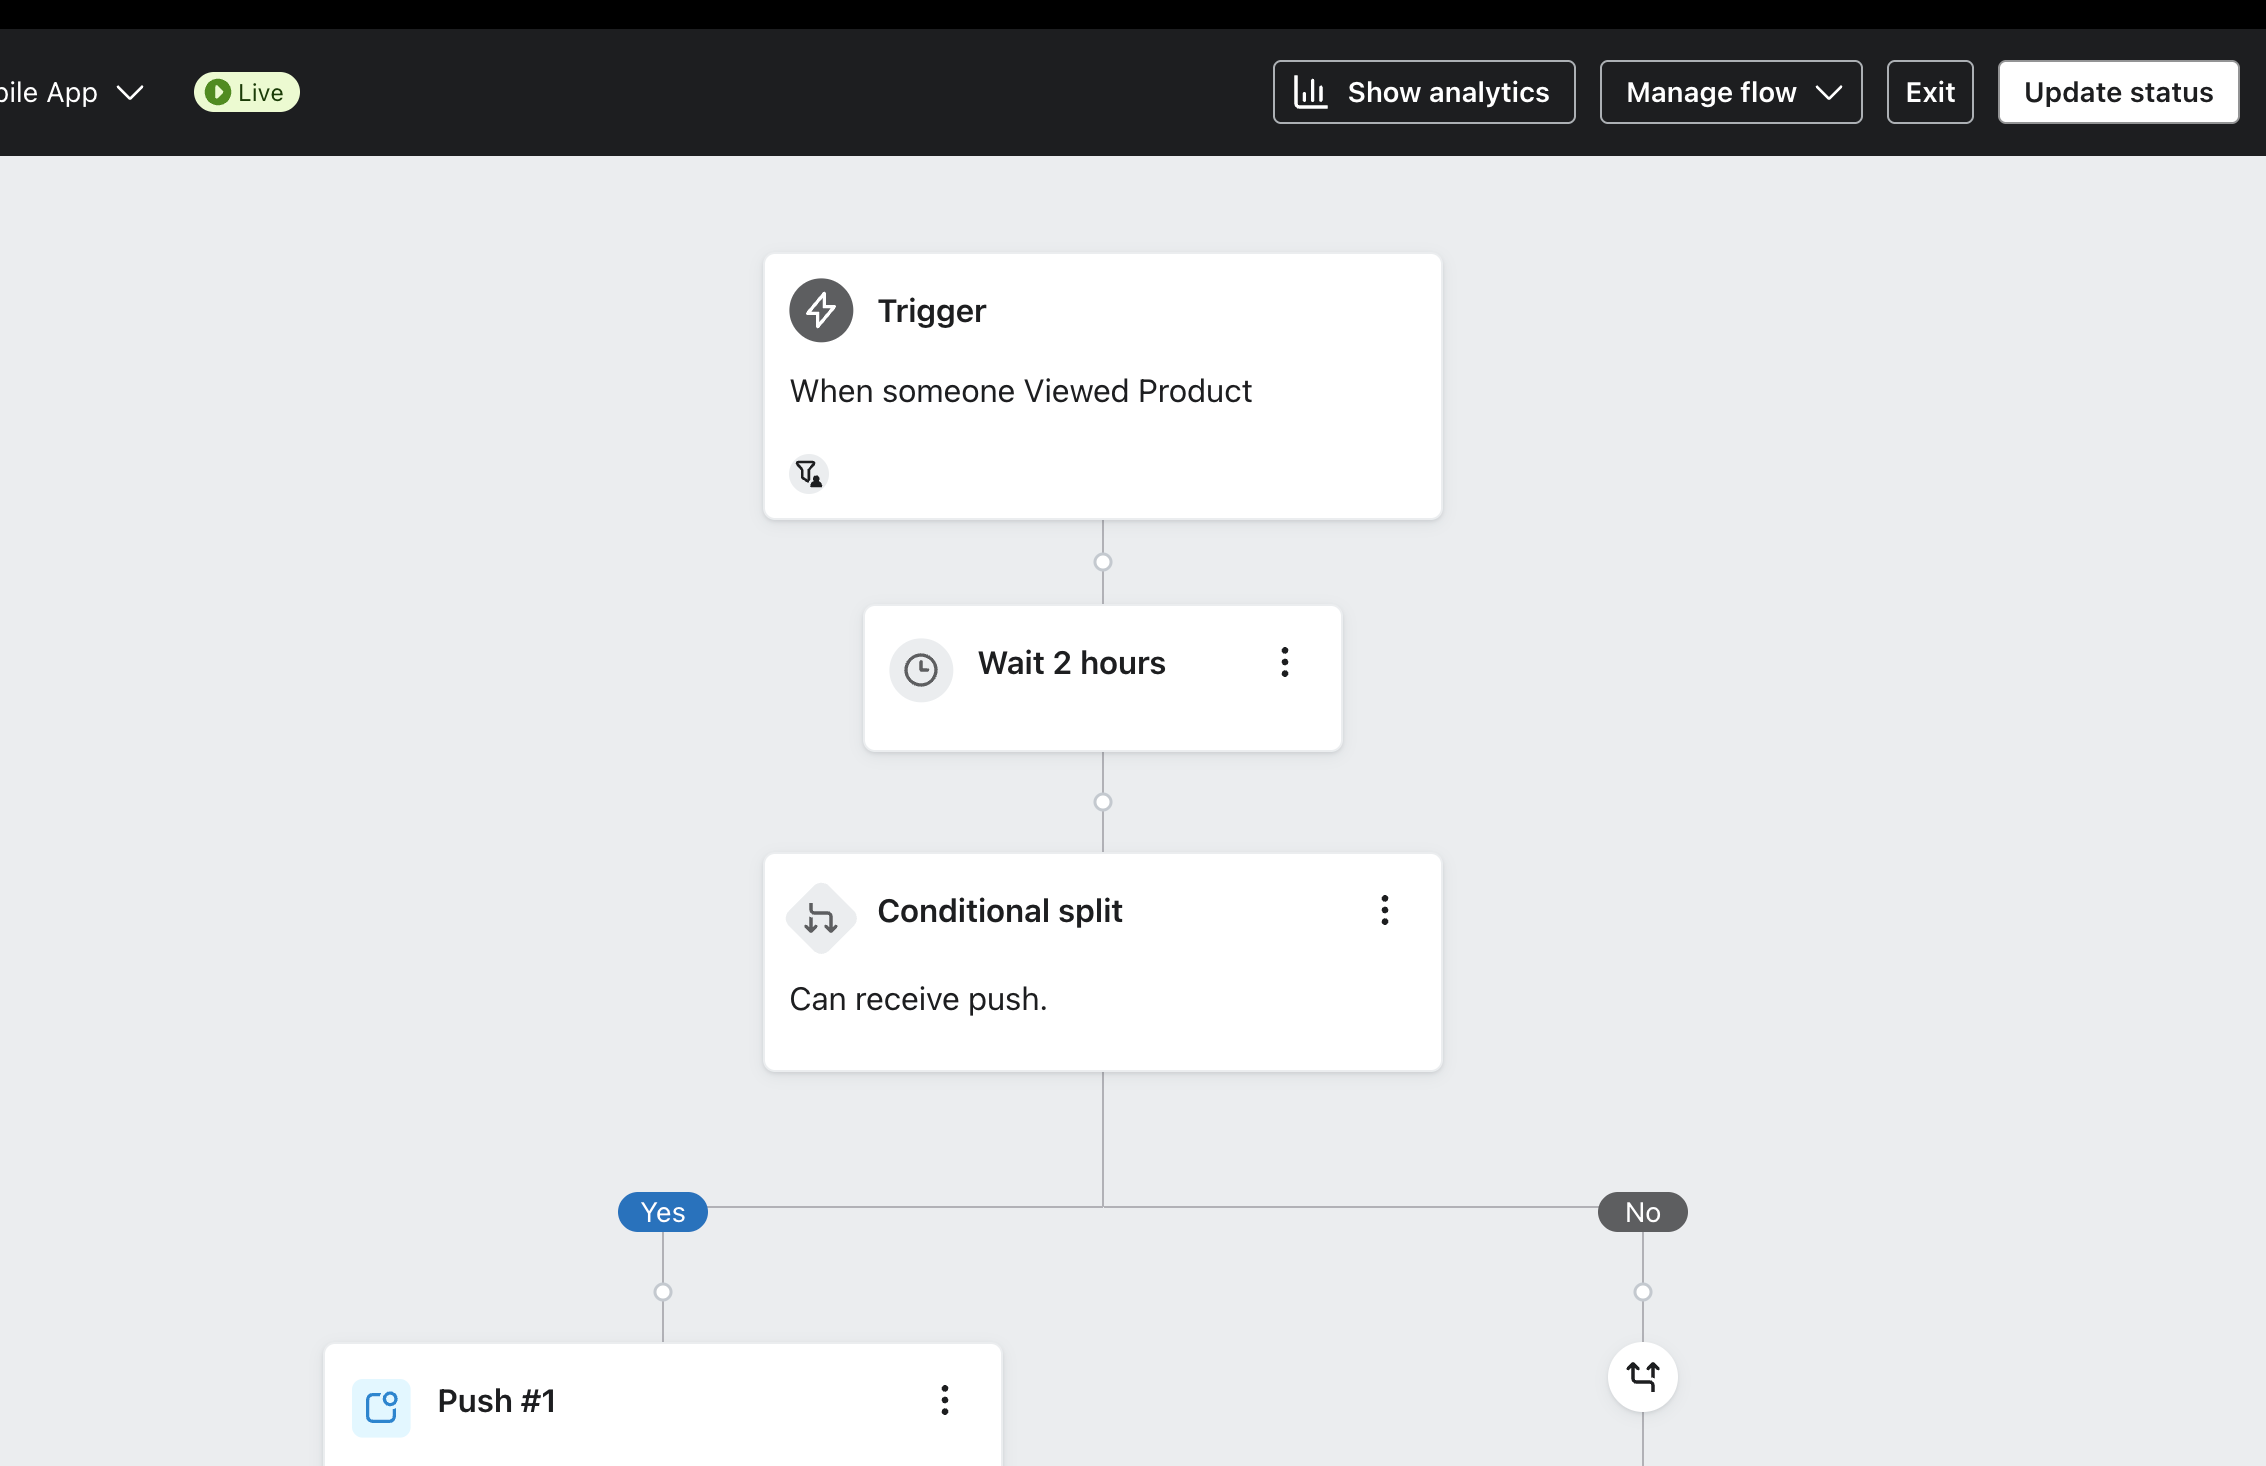
Here’s an overview on how you can create flows for push notifications. Example case - Sending an automated push for users who viewed a product and abandoned.
Push Notification Flows Analytics
Klaviyo provides detailed analytics for push notification flows, helping you measure performance and optimize for better engagement and conversions.
With flow analytics, you can track:
Delivery Rate – How many users successfully received the push notification.
Open Rate – How many users tapped the notification to open your app.
Conversion Metrics – Actions taken after opening the push (e.g., purchase, product view).
Drop-off Points – See where users exited the flow, helping you refine timing and messaging.
These insights help you understand what’s working, test improvements, and continuously improve your mobile engagement strategy through data-driven decisions.
You can click on ‘Show Analytics’ in your Klaviyo Flow Editor.
Refer Klaviyo's FAQ here - https://help.appbrew.com/articles/7522045022-klaviyo-faq